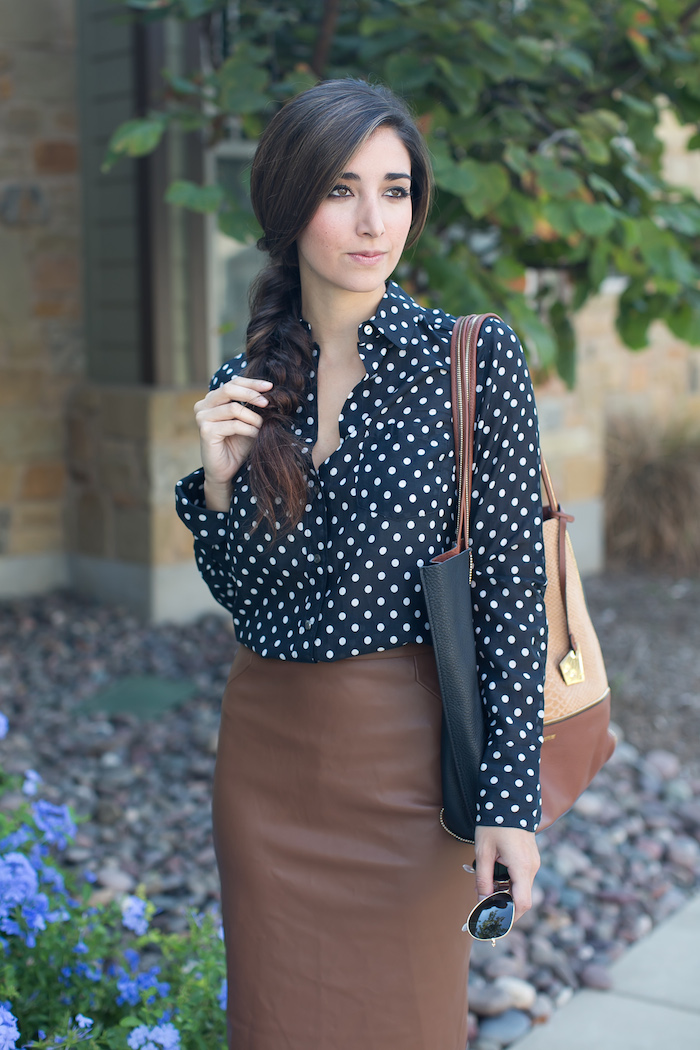
It has been WAY too long since I have had the chance to collaborate with Jessi from The Darling Detail and I must admit we were both giddy to be back working together to create this fun look for YOU! You remember the drill from our last collaboration…she spills all the details on her look over on her blog and I will dish on everything you need to know about the beauty over here. In the interest of full disclosure, you need to know that she is still wearing her clip in hair extensions from this shoot minus the side pieces. They really do make all the difference in a voluminous braid so treat yourself ladies!
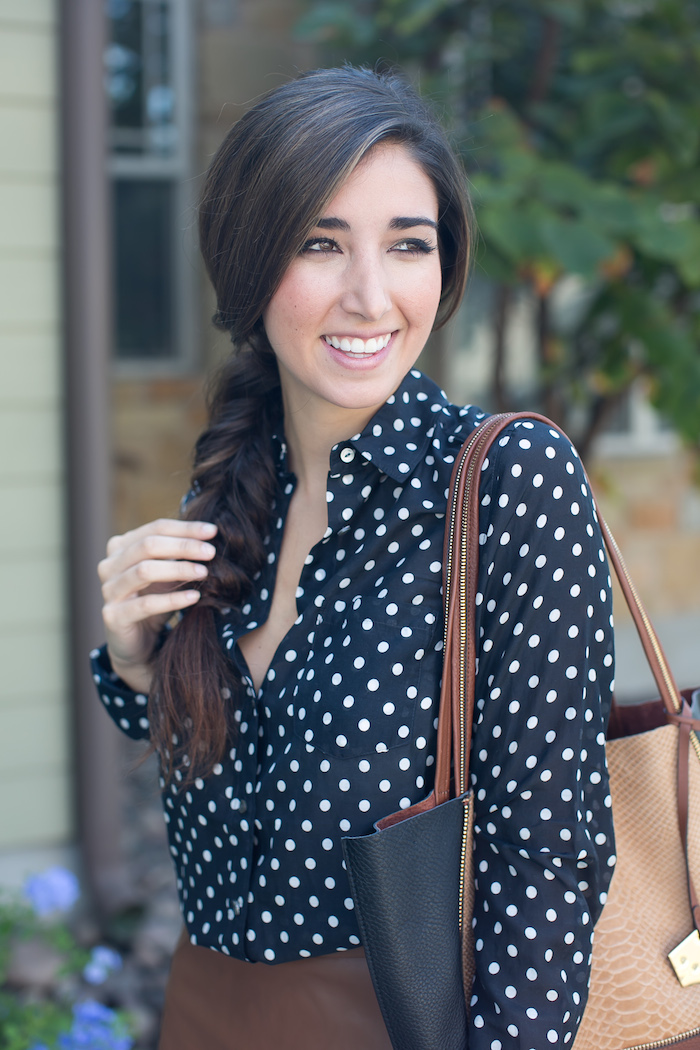
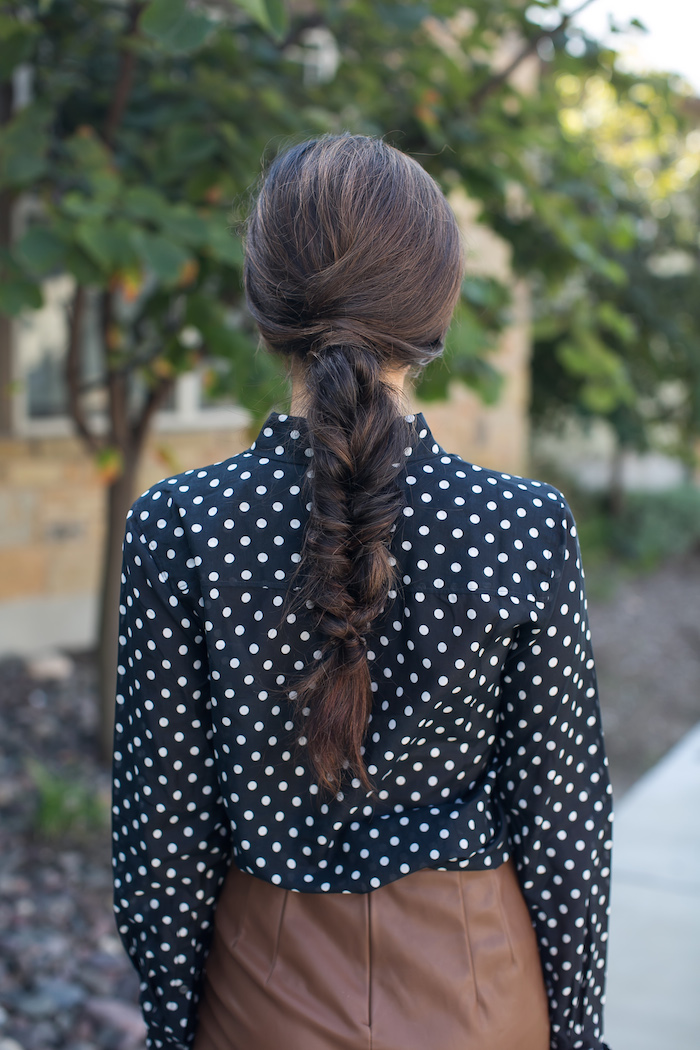
I’ve been wanting to play around with a fun textured braid and while I had some inspiration I made this one up as we went. The overall look is a fairly polished silhouette that pairs well with her chic look, there is so much interest going on in the braid it keeps it fun. It is incredibly easy and the technique is one you could try with a multitude of braids or twists so get creative!
Scroll down for the TUTORIAL on the braid (I tried to be super specific) and hop on over to THE DARLING DETAIL for scoop on this darling (wink wink) outfit!
TEXTURED BRAID TUTORIAL
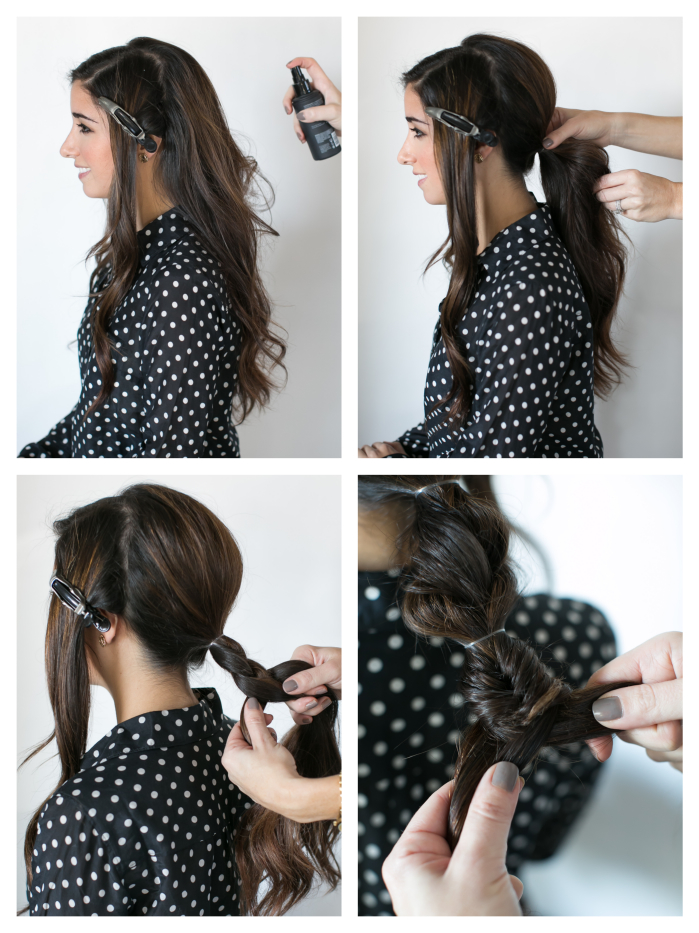
1.) Separate all hair from the ear forward and secure with clips. Adding some texture in the hair will set you up for a more textured braid in the end.
2.) Secure remaining hair into a ponytail at the nap of the neck.
3.) Create three strand braid in the ponytail and secure with a small elastic a few inches down.
4.) Create a fish tail braid that goes a few more inches down and tie off with another elastic band. Repeat the three strand braid and finish with a final elastic band so you have three sections with various braids or twists (your choice on the combo).
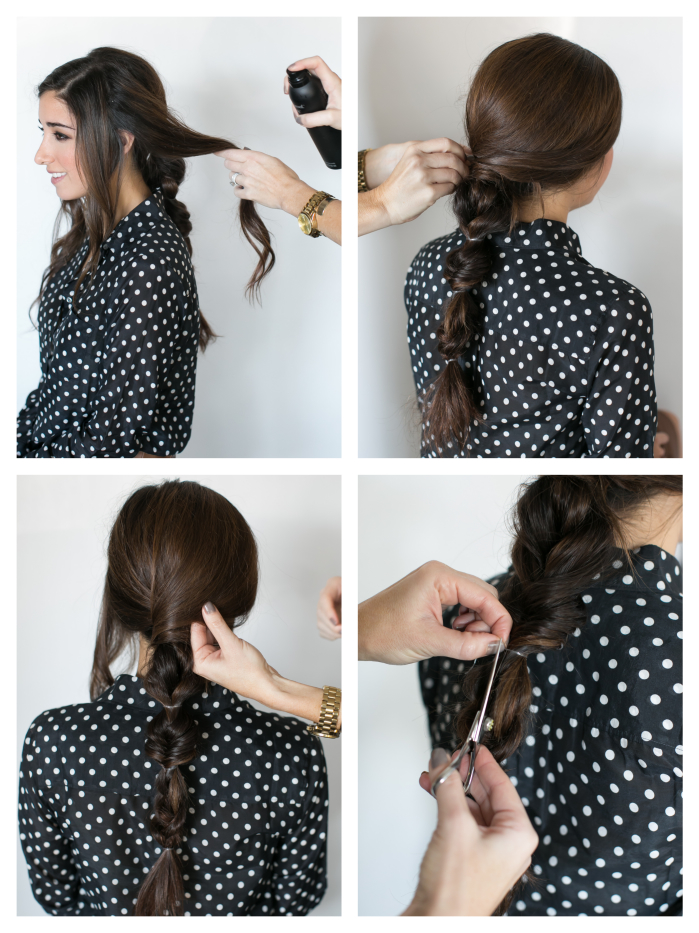 5.) Begin taking sections of hair from the hair that had originally been clipped out of the way and gently wrap around the top of the braid to cover the elastic.
6.) Continue taking sections (the smaller the sections the more intricate the look) and wrapping around the ponytail base.
7.) Secure with bobby pins and lightly spray with hair spray.
8.) Carefully cut the middle two elastic bands to marry all three braids into one braid.
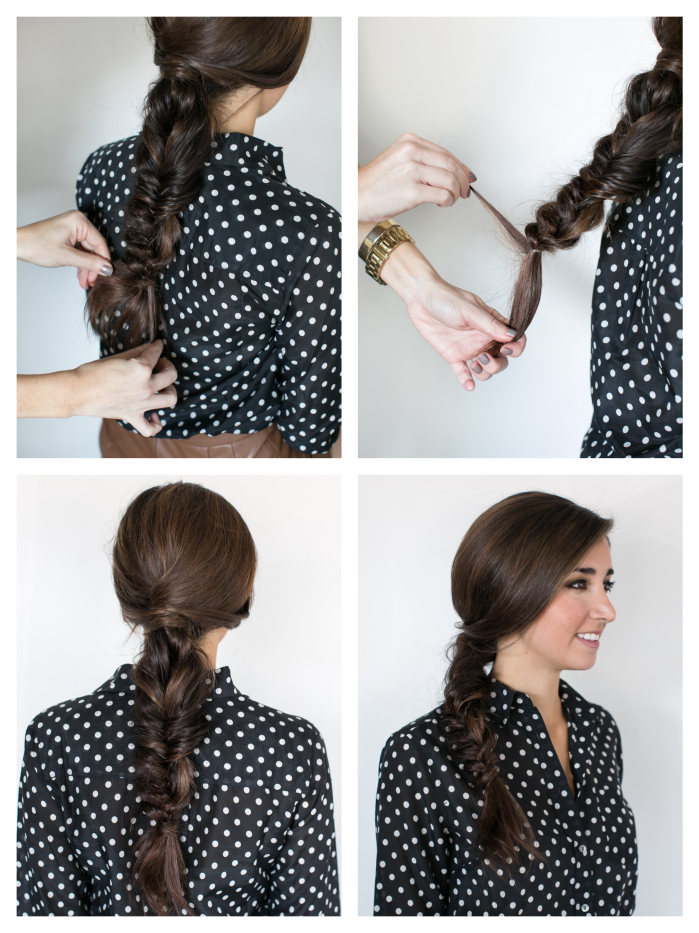 9.) Separate out a small piece of hair from the tail of the braid and push the rest of the braid up slightly on itself. This will create a wider braid and you can start pulling on it and messing it up a little until it gets that perfectly imperfect look.
10.) Wrap the small piece of hair around the end of the braid to cover the elastic and secure with a bobby pin.
To book an appointment visit Mirror Mirror or call (512)420-8868 to book!
CONTRIBUTORS:
 PHOTOGRAPHY: Melissa Glynn has spent the past six year developing a style that aims to show off just how fantastic you are. This self proclaimed “Texas girl” loves creating images that are classic, timeless, and lovely. When she’s not behind the camera she loves playing with her pup “Nolte”, riding bicycles, traveling, yoga, and a really great glass of red zinfandel!
Get connected on her website, Twitter and Instagram!

[…] so I’m thinking it’s time to let your hair down (pun intended) and braid it up. Find out how to get this gorgeous textured braid here, and trust me, you don’t want to miss […]